We use cookies on our website.
Some of them are necessary for the functioning of the site, but you can decide about others.
Tags: Custom Heads Player Heads
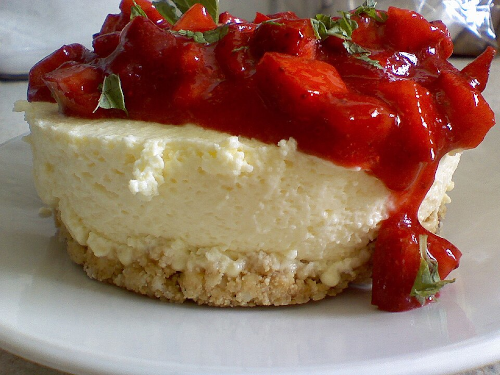
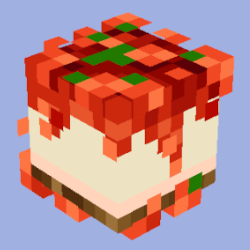
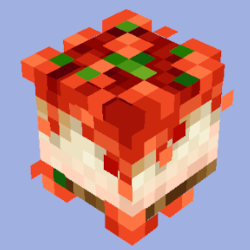
In this tutorial we will learn how to shade a custom head. Many people ask themselves how to create a high quality texture with detailed shading and vibrant colors. First, we should decide what will be made. You should find a reference if possible, here is the image we will be referencing.
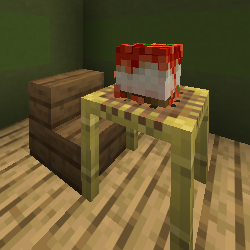
We are going to make a cheesecake head. Not only do users love having new food heads, but you will also get practice shading a rough (cake crumb) texture, and a shiny (cake frosting) texture. A good rule that you can use is that if the object can be fit into a cube with minimal distortion, then it would work well as a head.
We will be using PMCSkin3d to make the head.
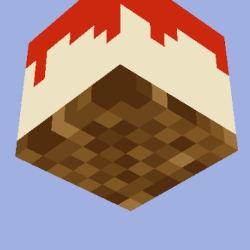
The first step is to block out the basic colors. Generally, it is important that your base color is not a pure value of 100% or 0% on either the value or the saturation. This will give you room to add different tones and to hue shift later on. We will start with a saturation of 98% on some elements like the red frosting, because we have personally noticed users like extremely saturated vibrant colors.
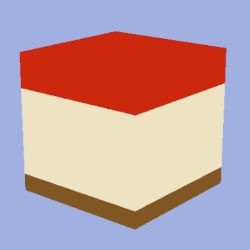
Now, block out the second layer and any smaller details of the color areas. You now have an unshaded base and can continue with shading.
First, a palette should be established. Start from the base color you used to block out the shape. Create some colors in steps with hue shifting. To hue shift, if you are going darker in color, decrease the value, increase the saturation, and shift the color slightly towards purple or blue on the wheel. If you are going lighter in color, increase the value, decrease the saturation, and hue shift towards yellow or orange on the wheel. Make a color at the maximum value you plan to use, and create intermediate steps between the colors with a semi-transparent brush. The palette does not necessarily have to be linear, either. It may seem confusing at first, but once you get practice with hue-shifting you won’t even need to think about doing it.

Now, we can start shading the individual color areas. We will start by shading the crust of the cheesecake. Areas directly underneath the strawberries will be darker than the surrounding area. You may realize when shading that you may not use all of the colors from your pallette, or you may need to take a transparency brush and make a new blended color for it to look right.
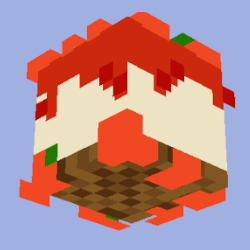
It is also worth noting that even if you are new to making skins, you should never use the noise brush in your editor. Noise added through this does not hue shift, and it does not add texture information to the skin either. It is usually much better to apply an intentional pattern. As you can see, we are using a dithering pattern with some random chunks to break up the grid.
You don’t want to overdo the contrast while shading or it will look like pieces of a different substance, but you don’t want to underdo the shading, or else there would be zero sense of depth and shape. A good middle ground exists, and it is ideal to use similar contrast to what vanilla Minecraft uses.
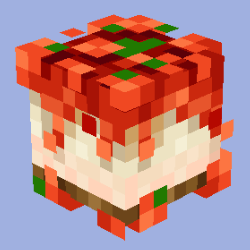
We will move on to shading the strawberries. It is a good rule that the light source is coming from directly above the head, and we apply this to how we color the strawberries. Because the strawberries are a similar color to the syrup they are on, it is extremely important that we make the underlying syrup and the nearby area darker, such that proper contrast between these elements are achieved.
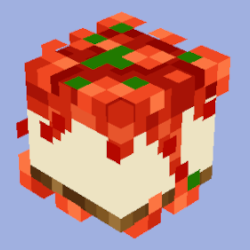
With “shiny” materials, the texture generally reacts more strongly and with greater contrast than a dull texture. A highlight could not be fit onto the top of this cheesecake due to it confusing the strawberries on the second layer.
You may decide that some things look better during the process of shading. It looked more natural here that the glaze is at its brightest where the drips terminate.
Now, to shade the cheese in the cheesecake. The first thing to do is establish that the glaze is casting a shadow onto the cheesecake underneath it.

We can then start applying dithering and texture like we did for the crust.
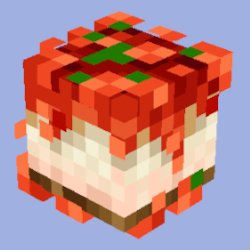
In order to make the cheesecake more visually interesting, we apply a slight pink gradient to the bottom of the crust with the transparent brush. This gave the texture more detail and form.
Some pixels look out of place or too sharp, so we take a transparency brush and make an extra tone, and start painting around to smooth it out. We repeat this until no pixels look wrong.
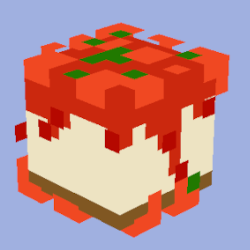
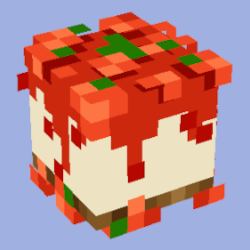
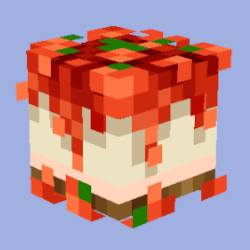
We shade the strawberry leaves with a slight gradient pattern. We are now done for today. It is good practice to leave it alone for a while, and check back tomorrow or a few days later.
When this is done, we can spot small details that wouldn’t have been noticed otherwise. If we do not find any small pixel errors after such a check, then it is complete.

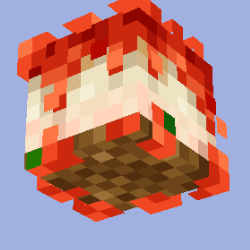
Your creation may look different than mine. Part of it is that every artist will eventually develop a distinct artstyle. Part of it is that you have not practiced for years yet. Every single head you make will require a slightly different process than the one listed in this tutorial. The more heads and Minecraft skins you make, the better you will get at this process. You can go further, and apply the fundamentals of this tutorial to normal pixel art, and even to 2D art in general.
Once you are happy with your head, you can upload it to the Head Command Generator and wait for it to be approved. It will take up to 3 weeks for your head to become visible to other users after you publish it. You may read about the Validation Process for here more information.